Archiving Film - EXIF data matters

This is a continuation to my Comparison of Minolta Data Savers article, where I explored capabilities of Minolta cameras for storing exposure data. All of that collected data needs to be put into good use, and that's what we are going to do in this article.
Now, I want to open up a bit of my personal process related to my film photography, especially when photos transcend into the digital realm.
I've split this into two parts:
- Archiving, scanning and cataloging negatives
- Managing physical and digital catalog information
I'll also consider this from two vastly different angles, camera bodies with storing capabilities and the ones without. You can apply your favorite methods into the mix, but this is the way I use.
Why do all this?
This eases up the matching between your negatives and digital catalogue. If you want to find fast the negatives or vice versa, the digital scans or exposure data of a given roll or picture to that extent, these steps taken will make your life easier.
Basically it comes down to your strategy. Do you really want to store that data digitally and use that information to manage your catalogue?
I've set three things as my priorities:
- I want to be able to search images by camera
- I want to be able to search images by roll identifier
- Optionally, I want to be able to search images by lens information
In addition to these, I want to be able to search images by film information but it is not supported by EXIF as such.
Overall process
My archival process roughly looks like as following:
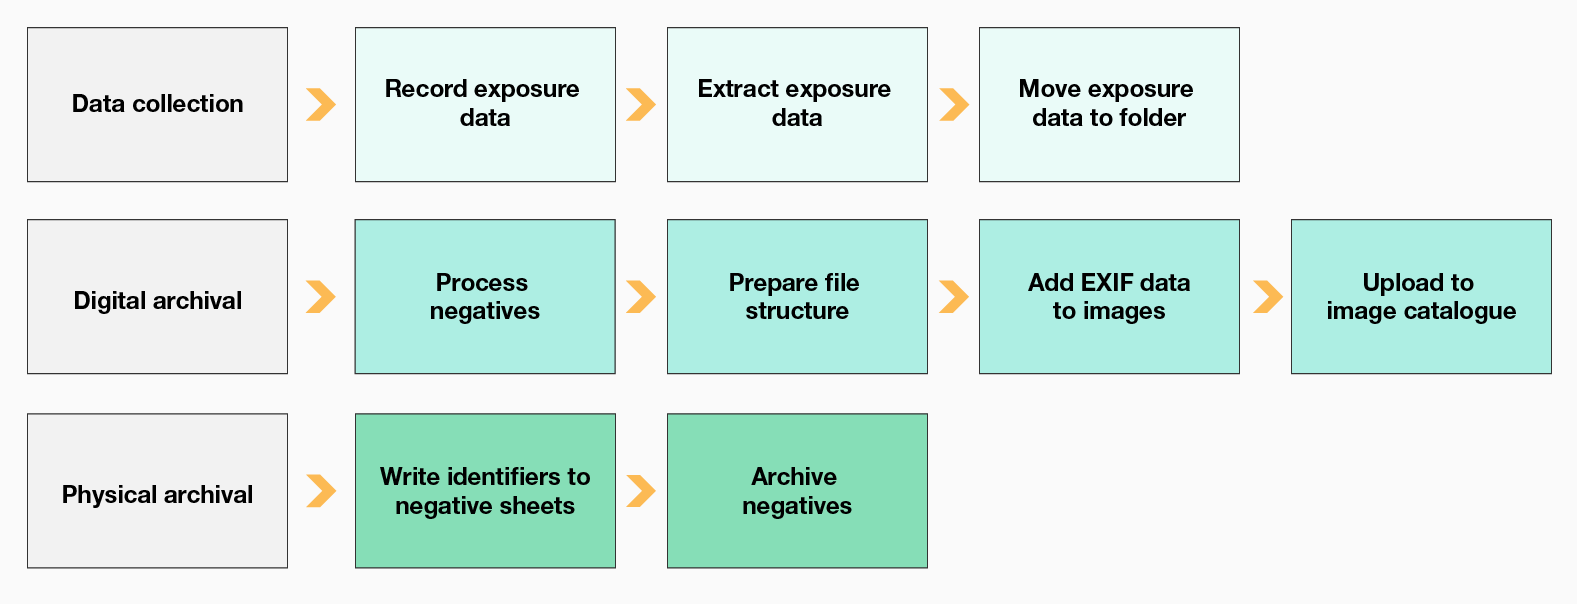
There are three inputs into the system:
- Developing negatives and scanning yourself (BW and ~80% of C-41*)
- Developing negatives at lab and scanning them yourself (~20% of C-41)
- Developing negatives and scanning at lab (typically E-6**)
E-6 refers to a similar process for slide film positives
Identifiers
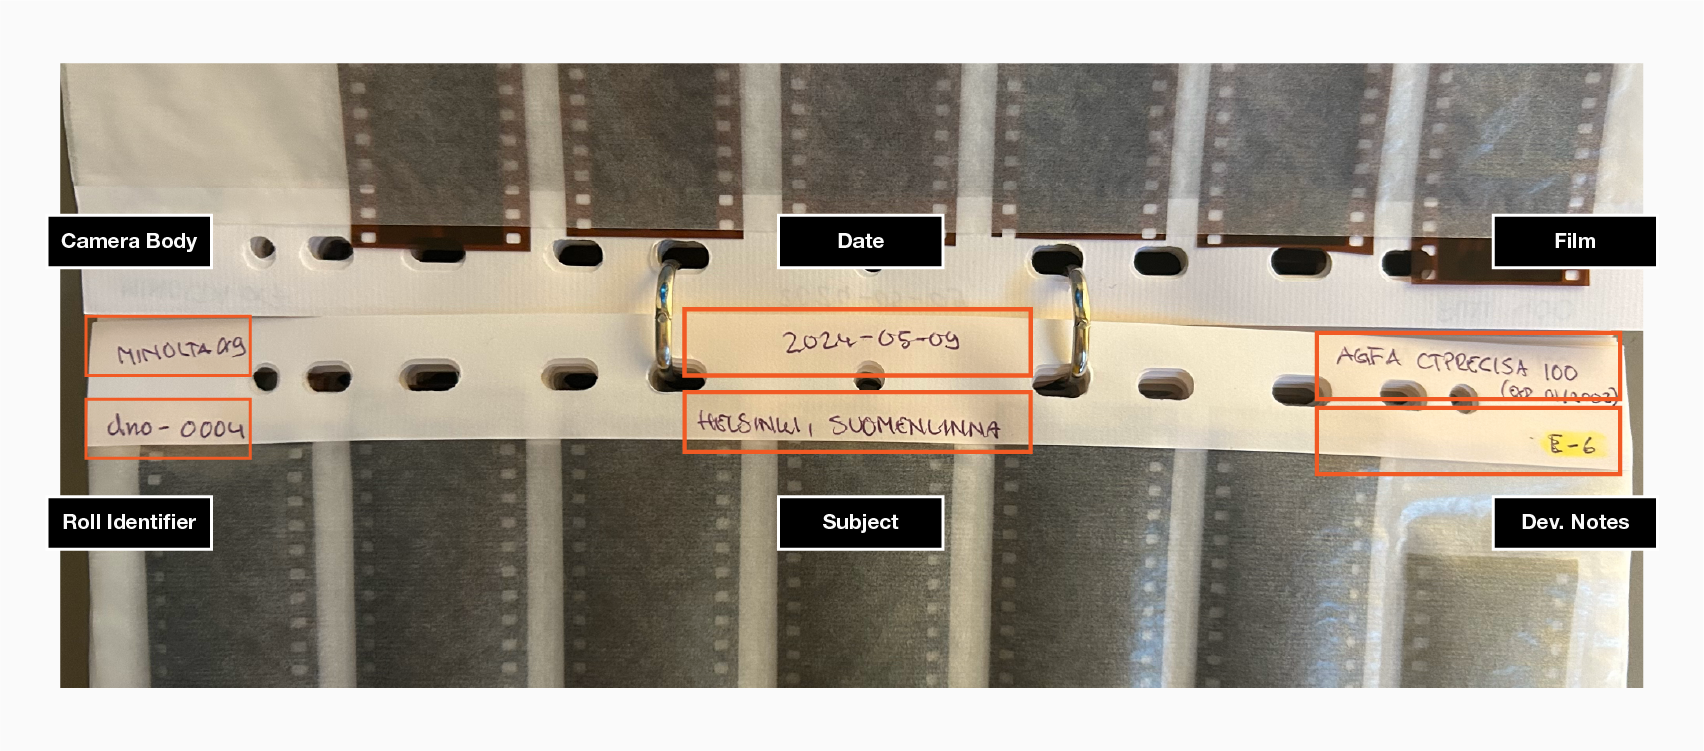
Identifiers play an important role on the three priorities I've set, particularly on the "how to search images by roll identifier" part.
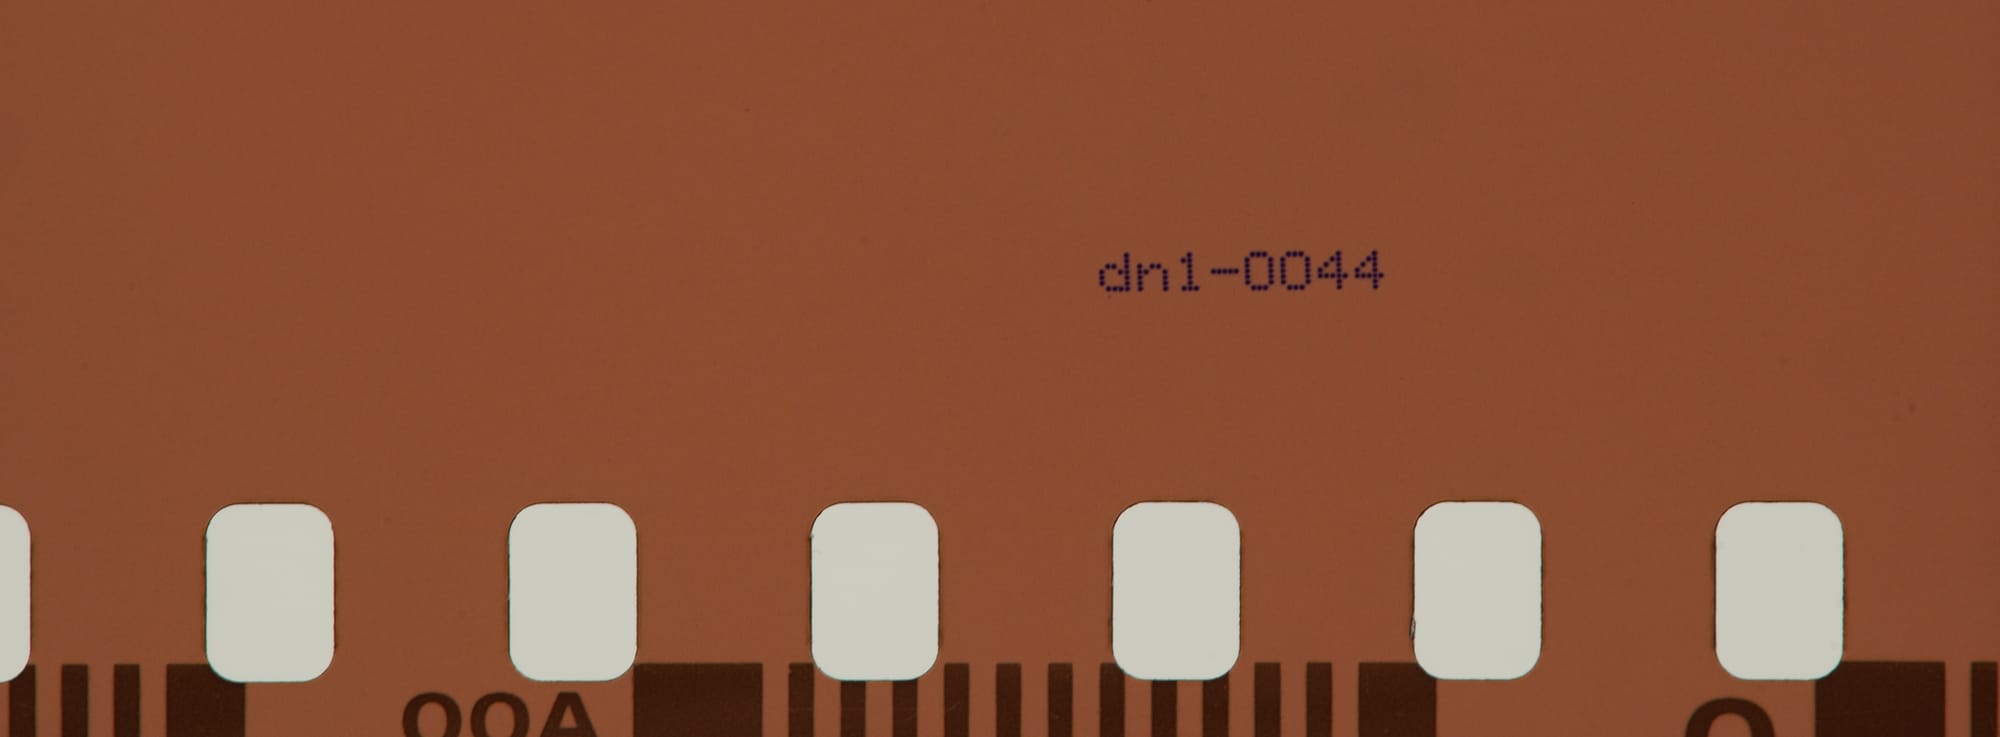
I assign a identifier to a camera frame to know, which particular frame I'd been using. For instance, following Minolta default naming schema provides me the following schema.
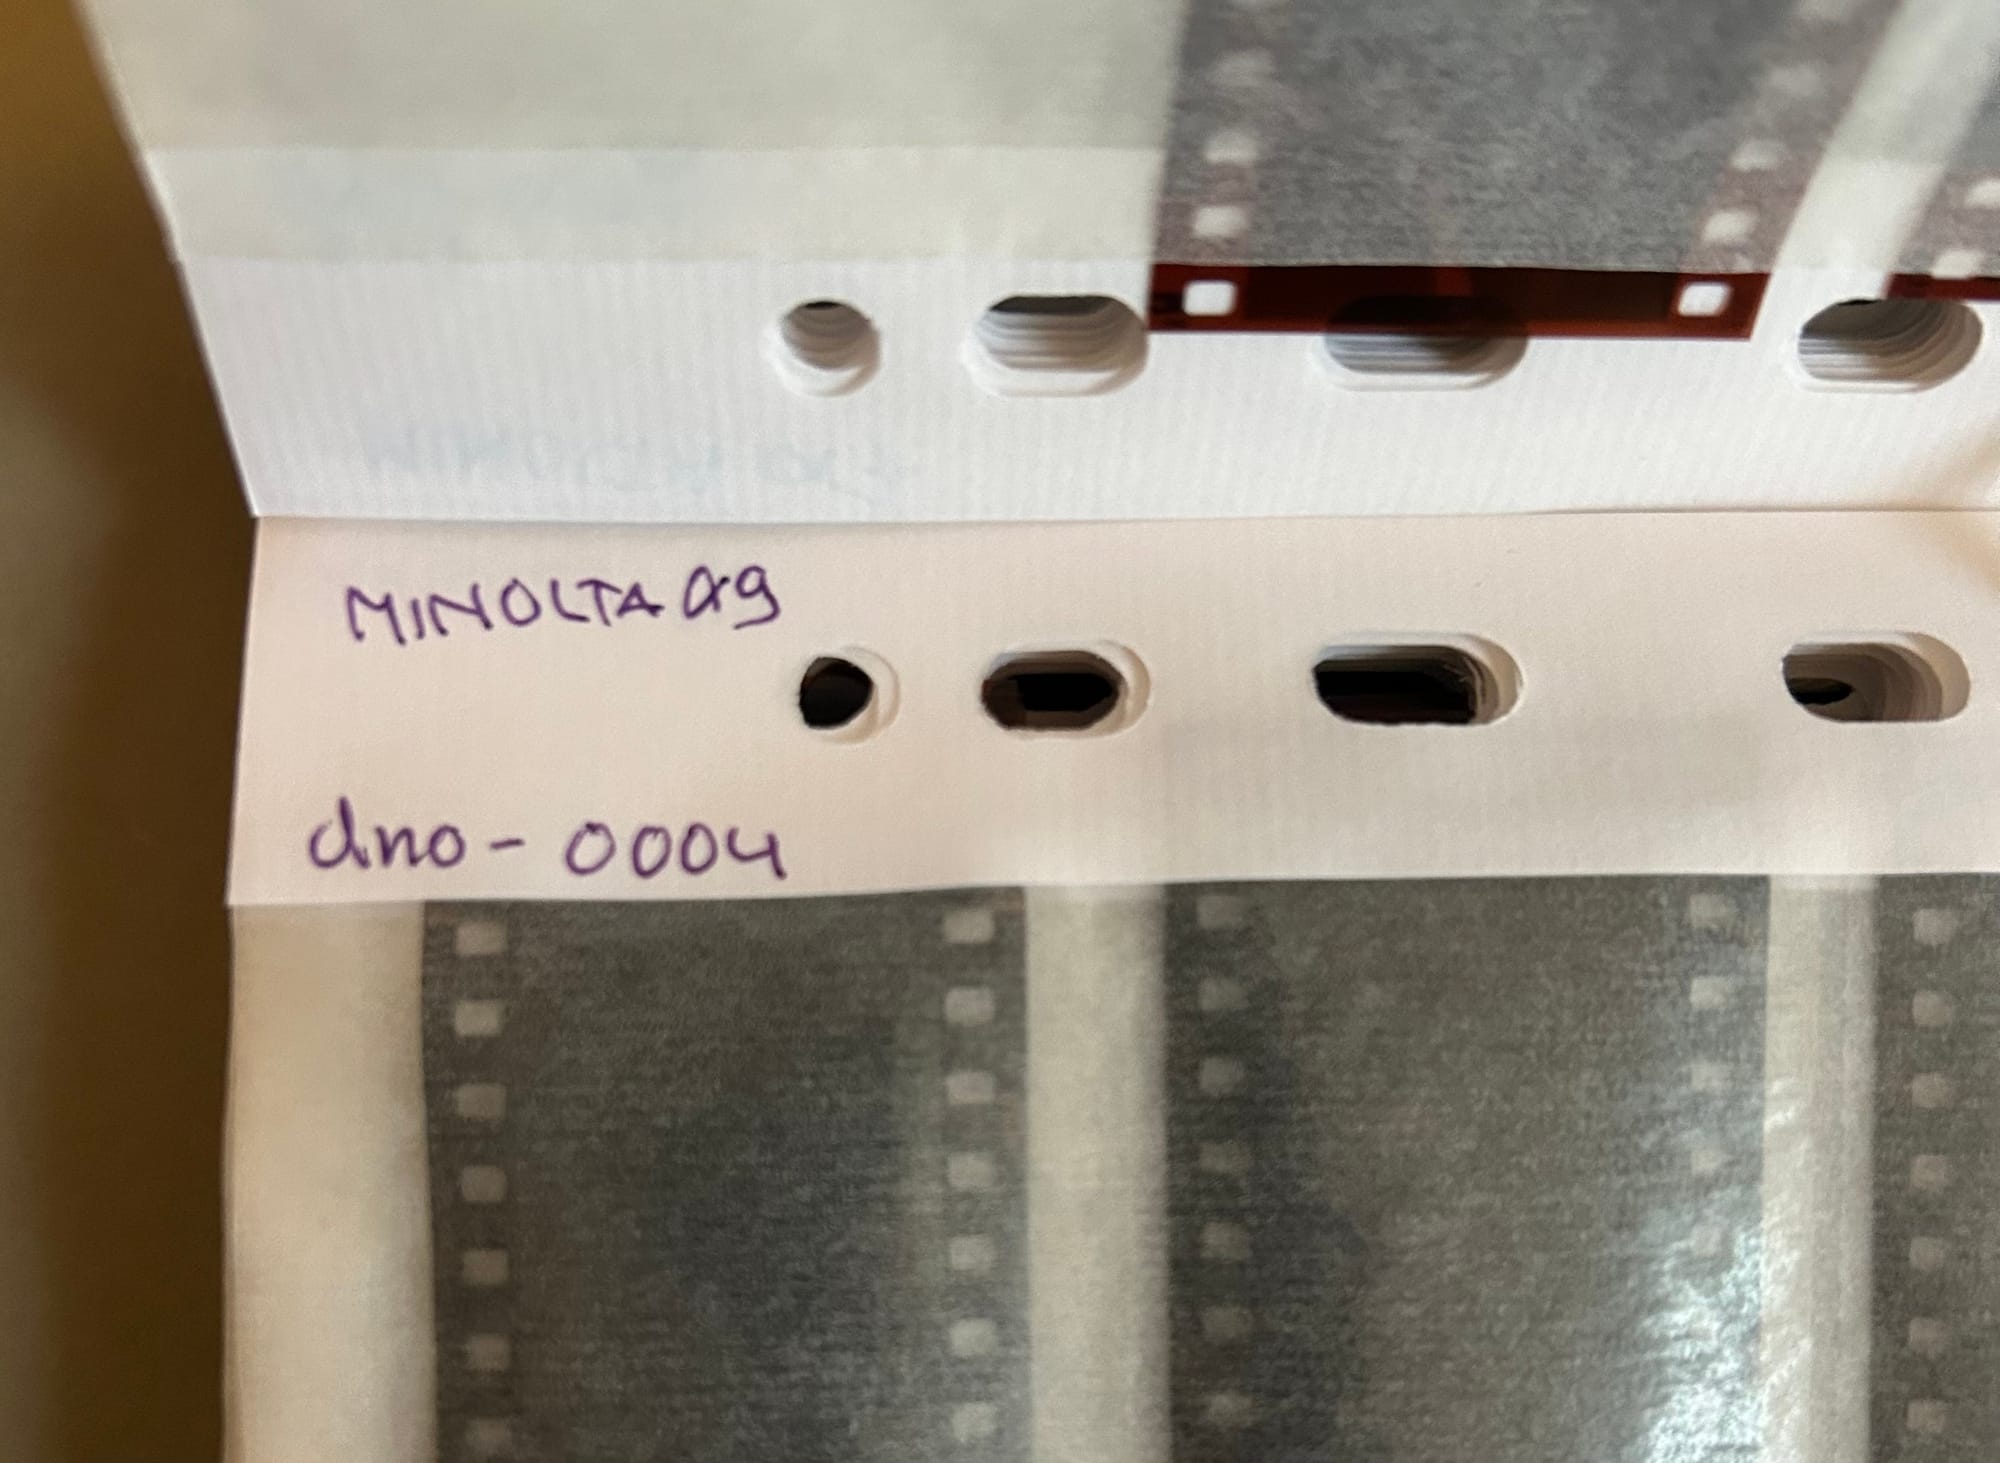
I'll write this information not only digitally, but physically as well. Minolta a7 and a9 make my life easier, as they mark the information on the negatives as well.
Examples from the wild ensues:
My current catalogue of film cameras following this identifier structure:
dno-xxxx - Minolta Alpha 9
dn1-xxxx - Minolta Alpha 7 (serial number: 20010378)
dn2-xxxx - Minolta Alpha 7 (serial number: 00202070)
dn3-xxxx - Minolta Alpha 7 (serial number: 91301443)
ds8-xxxx - Minolta Alpha 807si
xd1-xxxx - Minolta XD
xe1-xxxx - Minolta XE
xg1-xxxx - Minolta XG-1
xm1-xxxx - Minolta X-1 (AE Finder, serial number: 1203692)
xm2-xxxx - Minolta X-1 (AE-S Finder, serial number: 1027238)
----
kd1-xxxx - Kodak Six-20 Model D
kp1-xxxx - Konica Pop-10
f4e-xxxx - Nikon F4e
f5a-xxxx - Nikon F5
So for any given roll, manual or automatic body, I can reference it. Now we need to link it to the digital domain.
Folder structure
I follow following structure for a single roll of film:
Pictures
|
+---<date>-<subject>-(film, identifier)
  |
  +-- JPG
  +-- RAW
For several rolls per topic / session, the general structure stays mostly unaffected.
Pictures
|
+---<date>-<subject>
  |
  +---<date>-(film, identifier)
  | |
  | +-- JPG
  | +-- JPG (cropped, color-corrected)
  | +-- RAW
  |
  +---<date>-(digital camera body)
  | |
  | +-- JPG
  | +-- RAW
For sake of simplicity, you could just write the identifier to the folder name and be gone with it. That's it.
But we must go deeper.
Data collection
Scanning process
My scanning process is simple, I process a roll with my Sony A7C using Valoi 360 holder and CineStill CS-LITE lightsource. Camera is attached to my PC via Sony's Imaging Edge Desktop and RAW images are fed directly to designated folder.
Following my folder structure, I first create the RAW folder, where scanned images are processed in Adobe Lightroom (or Darktable's Negadoctor).
After processing negatives into positives, either via manually setting white balance, curves, and colours OR just using Negative Lab Pro in Lightroom, I remove any remaining dust and particles. Then I export images to JPG folders.
Exposure data
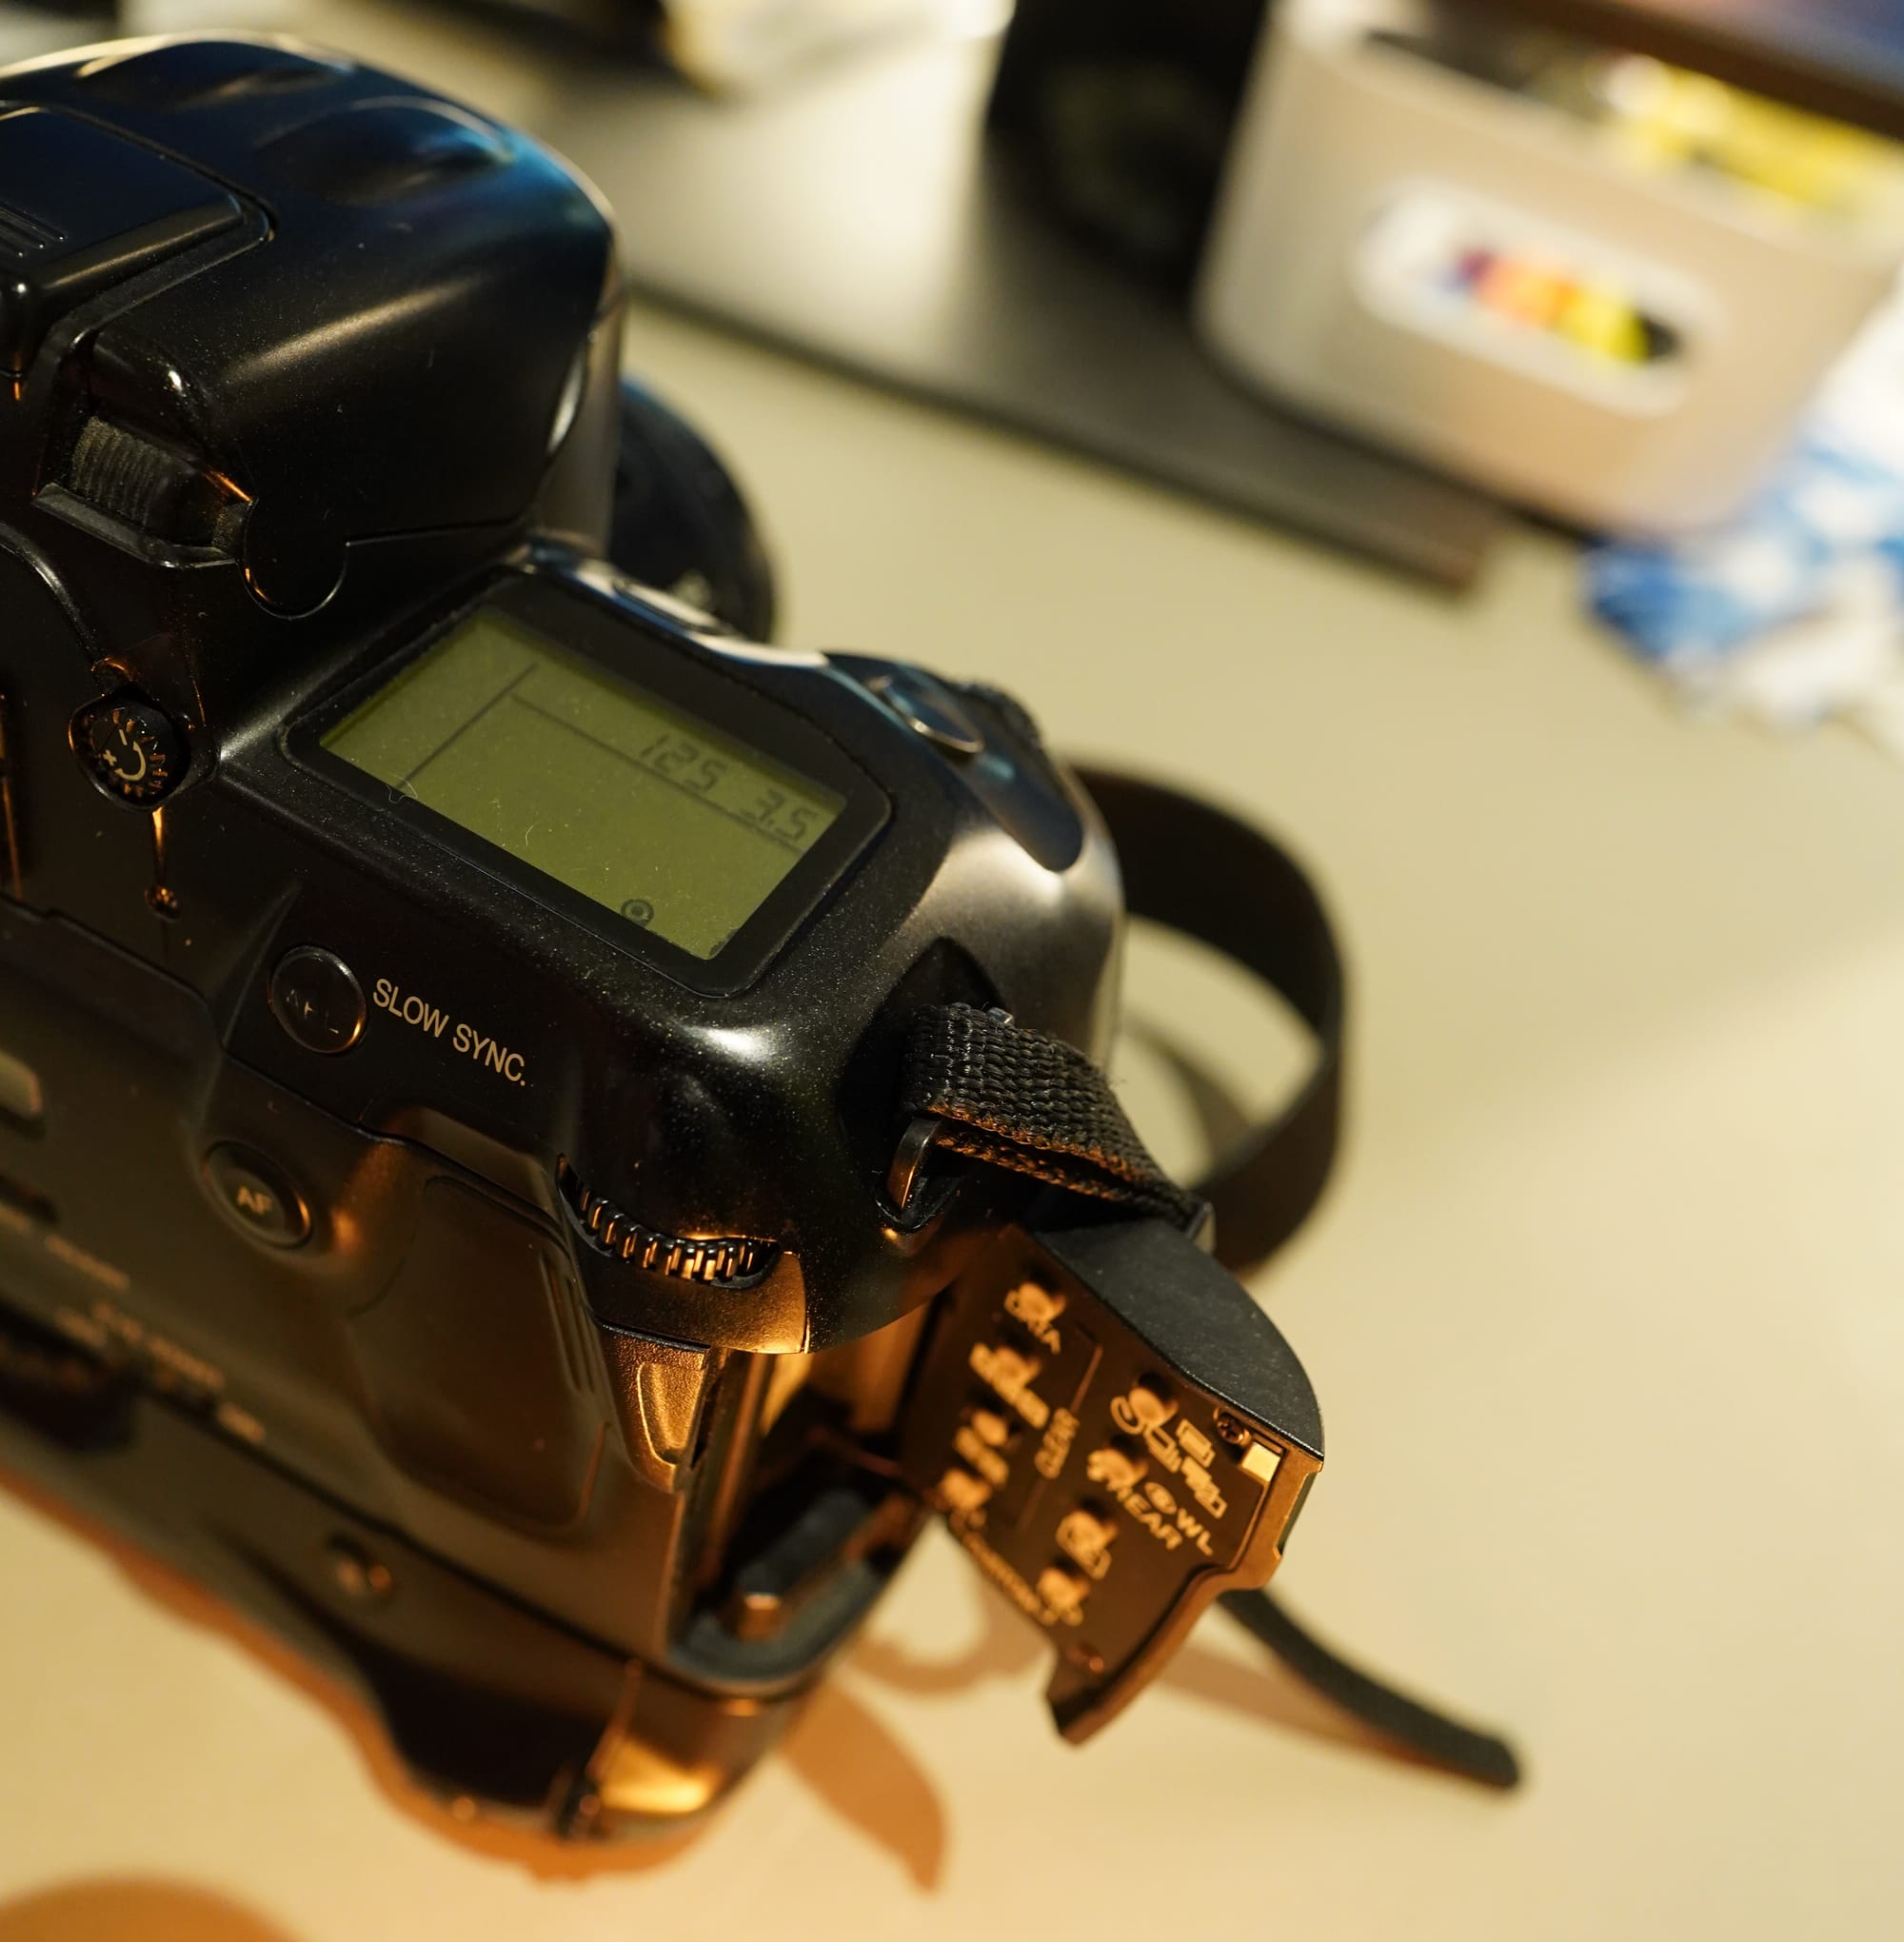
For Alpha 7 and 9, exposure data is gathered either from Minolta's DM-9 or DS-100. Extracting the information takes roughly two minutes.
You can read more about their capabilities in my article Comparison of Minolta Data Savers.
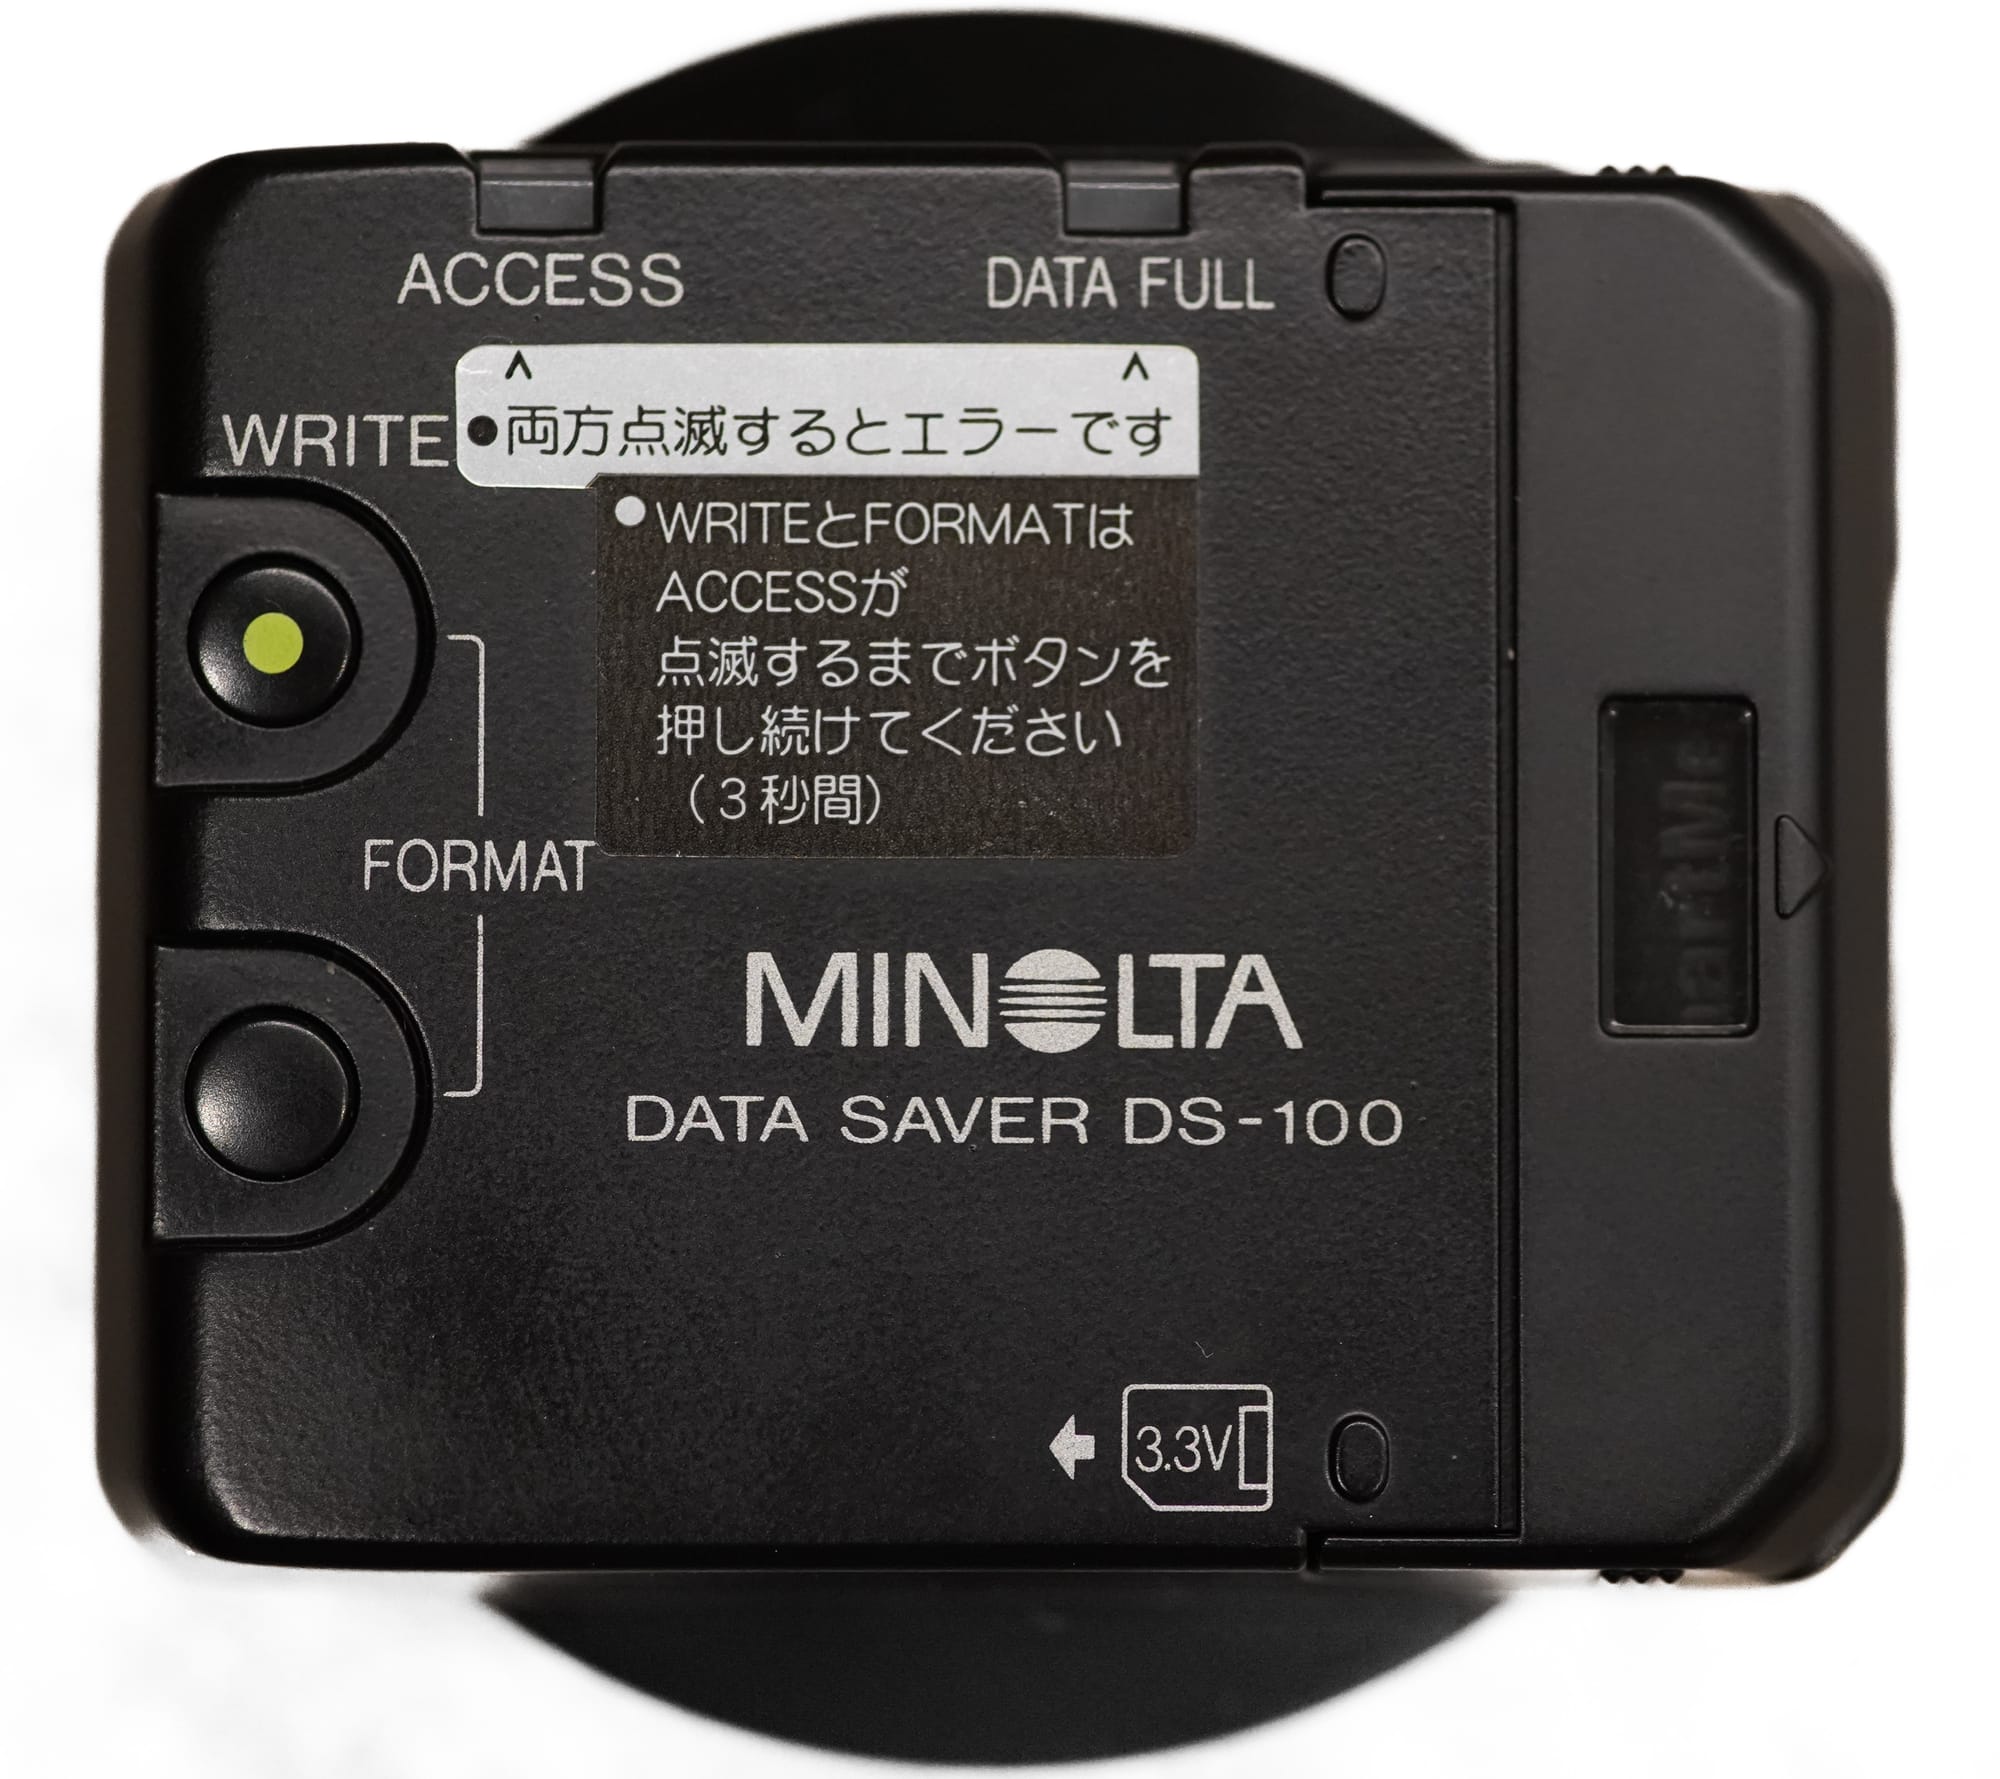
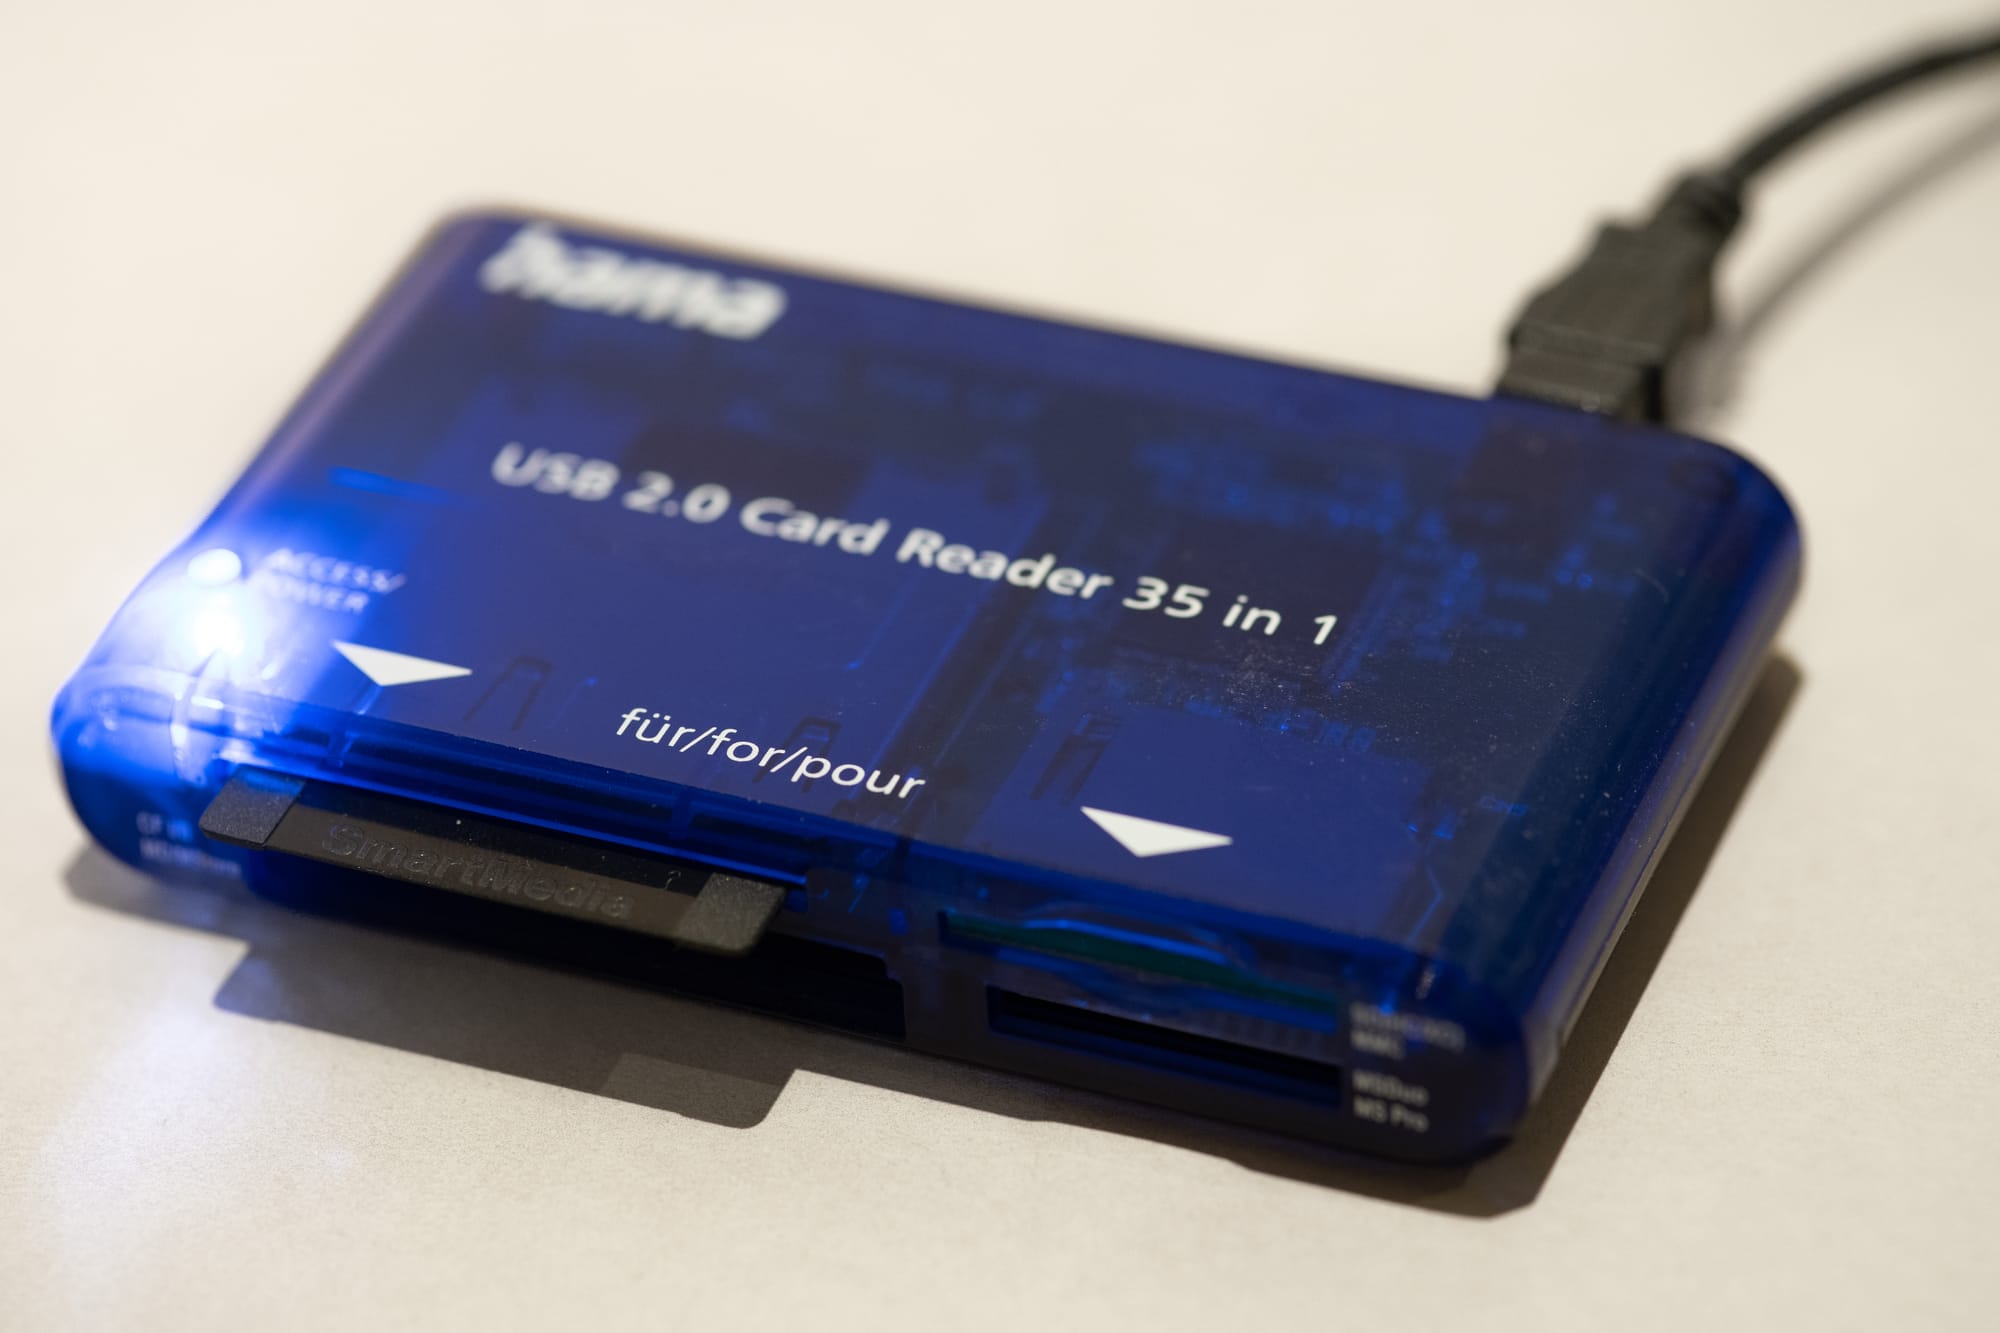
Just plug in the USB card reader and Smart Media Card to it, and you're set to go. I use a cheap Hama branded one that I bought for 9,90 euros from a local appliance store. So no need to look for a expensive archaic reader one from eBay.
DS-100's memory card's will have directory structure that can hold data for several bodies. Basically DM-9 is it's own entity, so in theory you could take several bodies and use data back across them but haven't gotten around to test this.
My process for exposure data exports is as following:
- Copy all the exposure information to a directory that holds all exposure files from the memory card
- Copy particular roll exposure information to the newly created directory

For Minolta bodies with data storing but no means to export them, I use a template, to which, I copy information by hand.
For manual bodies, I usually just record the lens used. I could take more notes but typically my photos are taken on the fly, not planned that much.
This work enables me to search for images using either camera model, lens or roll identifier in later stages.
File naming matters
Typically, I have separate folder for each roll of film. Also, I want to have a clean file structure, so I can instantaneously know what is the first or 13th shot, and it helps the EXIF information matching process.
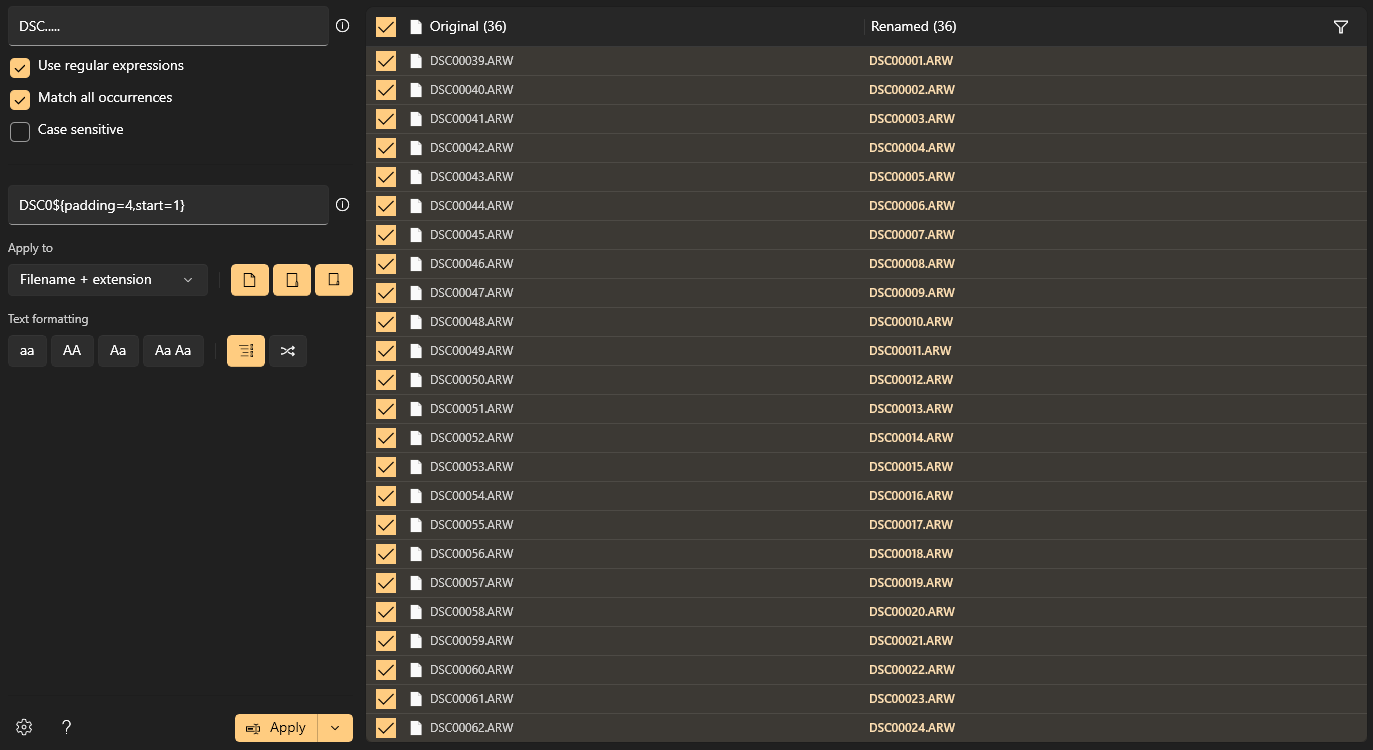
If I have somehow messed up the file naming, like scanning several rolls or used my camera's rolling file setup, I rename the files to match the DSC000 style format, where rolls start from DSC00001.jpg and end to DSC00036.jpg, for instance.
For this, I originally started with just selecting the files individually and painstakingly renaming them one by one. This is not the way.
Renaming files on Windows
Those of you using Windows, I cannot recommend enough Windows PowerRenamer, part of the PowerToys provided free by Microsoft. (https://learn.microsoft.com/en-us/windows/powertoys/powerrename)
The setup process should go like this:
- Install Windows PowerTools
- Open PowerTools application
- Navigate to File Management -> PowerRename
- Enable PowerRename
Usage of PowerRename:
- Navigate to directory where your files are stored
- Right-click on the file set and select "Rename with PowerRenamer"
- Check that "Use regular expressions" and "Match all occurrences" are ticked on
- Add the matching expression, I use "DSC....." for this
- "DSC" to match the beginning and then "....." for any five characters after that
- Add renaming format script
- Check file renaming matches your intent
- Press Apply
Matching with regular expression
My regular expressions could be better but simplicity does the trick - just add DSC and enough dots to cover the length. PowerRenamer shows the matches in real time.
For renaming the files, I use the following script:
DSC0${padding=4,start=1}Renaming scheme for Sony naming style (DSCxxxxx)
EXIF
Minolta data extraction
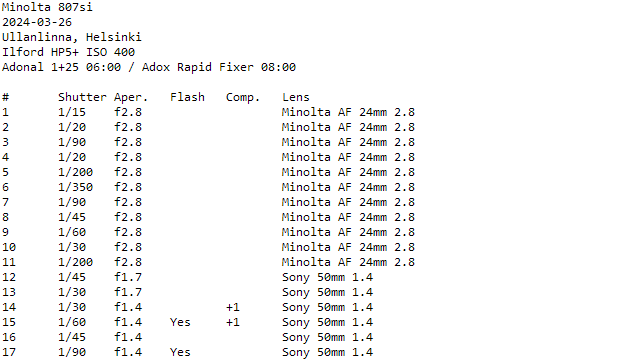
I use Minolta Alpha 7 (or Maxxum/Dynax in US/EU) as my primary camera. As previously mentioned in this article, Data Saver accessory DS-100 for Alpha 7, provides a set of data that is extracted to a text file.
For extracting the data, I use community developed parsing scripts, which will generate needed information to image files.
The file naming we did previously, now becomes important. As said, my file naming structure is in Sony's default file naming style of DSCxxxx.jpg, where the pattern is fairly simple. I just specify DSC, some leading zeros and specify @F to indicate that frame data is after the leading zeros. If you need to rename your images, please do revise the previous chapter for tips & tricks.
Usage: dn7toexif.pl pattern dn0-*.txt\n\n

jpegs/tiffs named according to pattern must exist in current directory, with the following substitutions into the pattern:

@F becomes frame number (from 00 to 99)
print "@U becomes Up-no (from 00000 to 99999)
@R becomes roll number from the DNO-filename (if found)
Usage instructions for the perl scripts
You need to have Perl installed to your computer. For Linux, it typically comes with your selected distribution flavor. In the world of Windows, you can opt for two paths.
- Use Windows Subsystem for Linux (https://learn.microsoft.com/en-us/windows/wsl/install)
- Install Strawberry (https://strawberryperl.com/)
I can recommend both options just fine.
Minolta A7 with DS-100
perl c:\<location>\dn7toexif.pl DSC000@F .\DN1-0XXX.TXTEXIF data extraction and processing for Minolta DS-100 (Windows)
./dn7toexif.pl DSC000@F ./DN1-0XXX.TXTEXIF data extraction and processing for Minolta DS-100 (Linux)
Minolta A9 with DM-9
In the case of Minolta DM-9, I use the following script:
perl c:\<location>\dm9toexif.pl DSC000@F .\DNO-0XXX.TXTEXIF data extraction and processing for Minolta DM9 (Windows)
./dm9toexif.pl DSC000@F ./DNO-0XXX.TXTEXIF data extraction and processing for Minolta DM9 (Linux)
The scripts are available at https://github.com/VSF1/minolta2exif, courtesy of William Brodie-Tyrrell and Vitor Fonseca.
Note that you cannot use these scripts without having DS-100 or DM-9 accessories for your cameras.
Manual data insertion
For the bodies that do not have ability to read the roll data or you resort to the good ol' pen and paper technique, there is a lot of manual work to be done.
ExifTool by Phil Harvey is a boon, when it comes to EXIF data manipulation. Along the way, I've setup few scripts to make it easier to update the information and ensure my data is as complete as possible.
Challenge 1: Lens data exists partly in DS-100 & DM-9
I had set as part of my archival strategy that optionally I want to be able to search images by lens information.
For DS-100 / DM-9, the caveat is, that lens information is somewhat recorded in the files.
dno-0016
Frame	Shutter	FNo.	Lens
1	   30	14 	  50/1.4
Minolta DM-9 TSV extract
dn2-0182,ISO:100
Frame	Shutter	FNo.	Lens
 1	15   	11 	35  /2.8
Minolta DS-100 TSV extract
You have to know, which lens you've used, based on focal length and maximum aperture. This causes unfortunate manual steps in preparing the EXIF information for catalog import.
Lens information in itself warrants a follow-up article at a later stage as it has a lot of potential for automation steps.
Challenge 2: Minolta SLRs with data saving capabilities
For 800si and particularly Minolta bodies with Data Cards, you have to be aware of the amount of roll data your body will store. Blink it and you will miss it when your old faithful writes over the data block just as Minolta engineering deities intended to.
As mentioned, I use a template to capture information and painstakingly enter data to it, picture by picture.
When scanning and processing the negatives, I'll add the EXIF data by hand to the images.
Challenge 3: Manual SLRs
For entirely manual camera bodies, I just use my iPhone's Notes app. I'll then add this information to my roll exposure template and fill in the blanks.
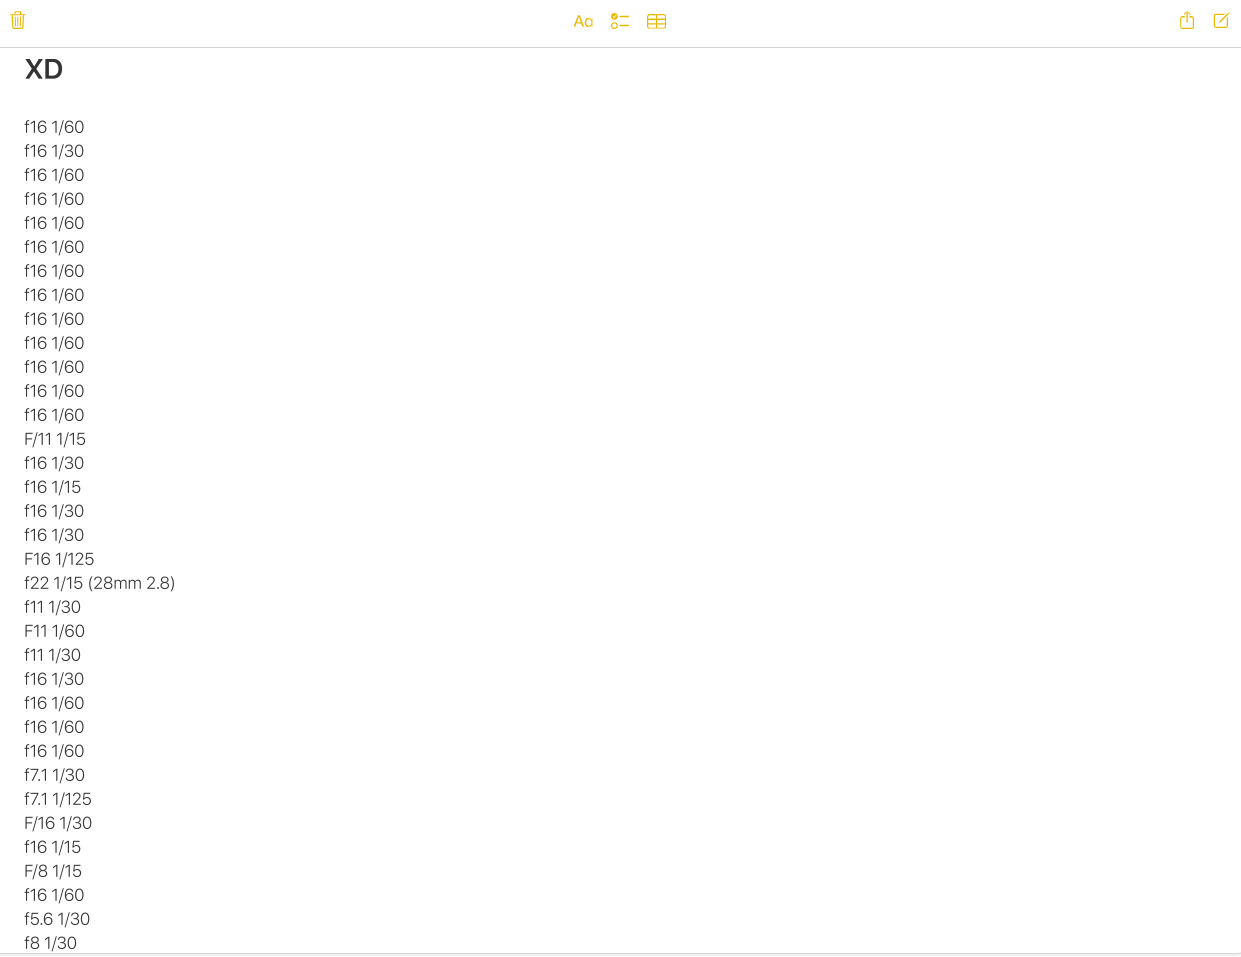
When scanning and processing the negatives, I'll add the EXIF data by hand to the images.
Physical archiving
I've skimped on archival binders and negative sleeves, but I've mainly used pergamine paper sleeves from Fotoimpex.
Managing the digital catalog
Immich (self-hosted alternative to Google Photos)
I've come to use a self-hosted option, Immich, in order to have a full control on the image storage capabilities.
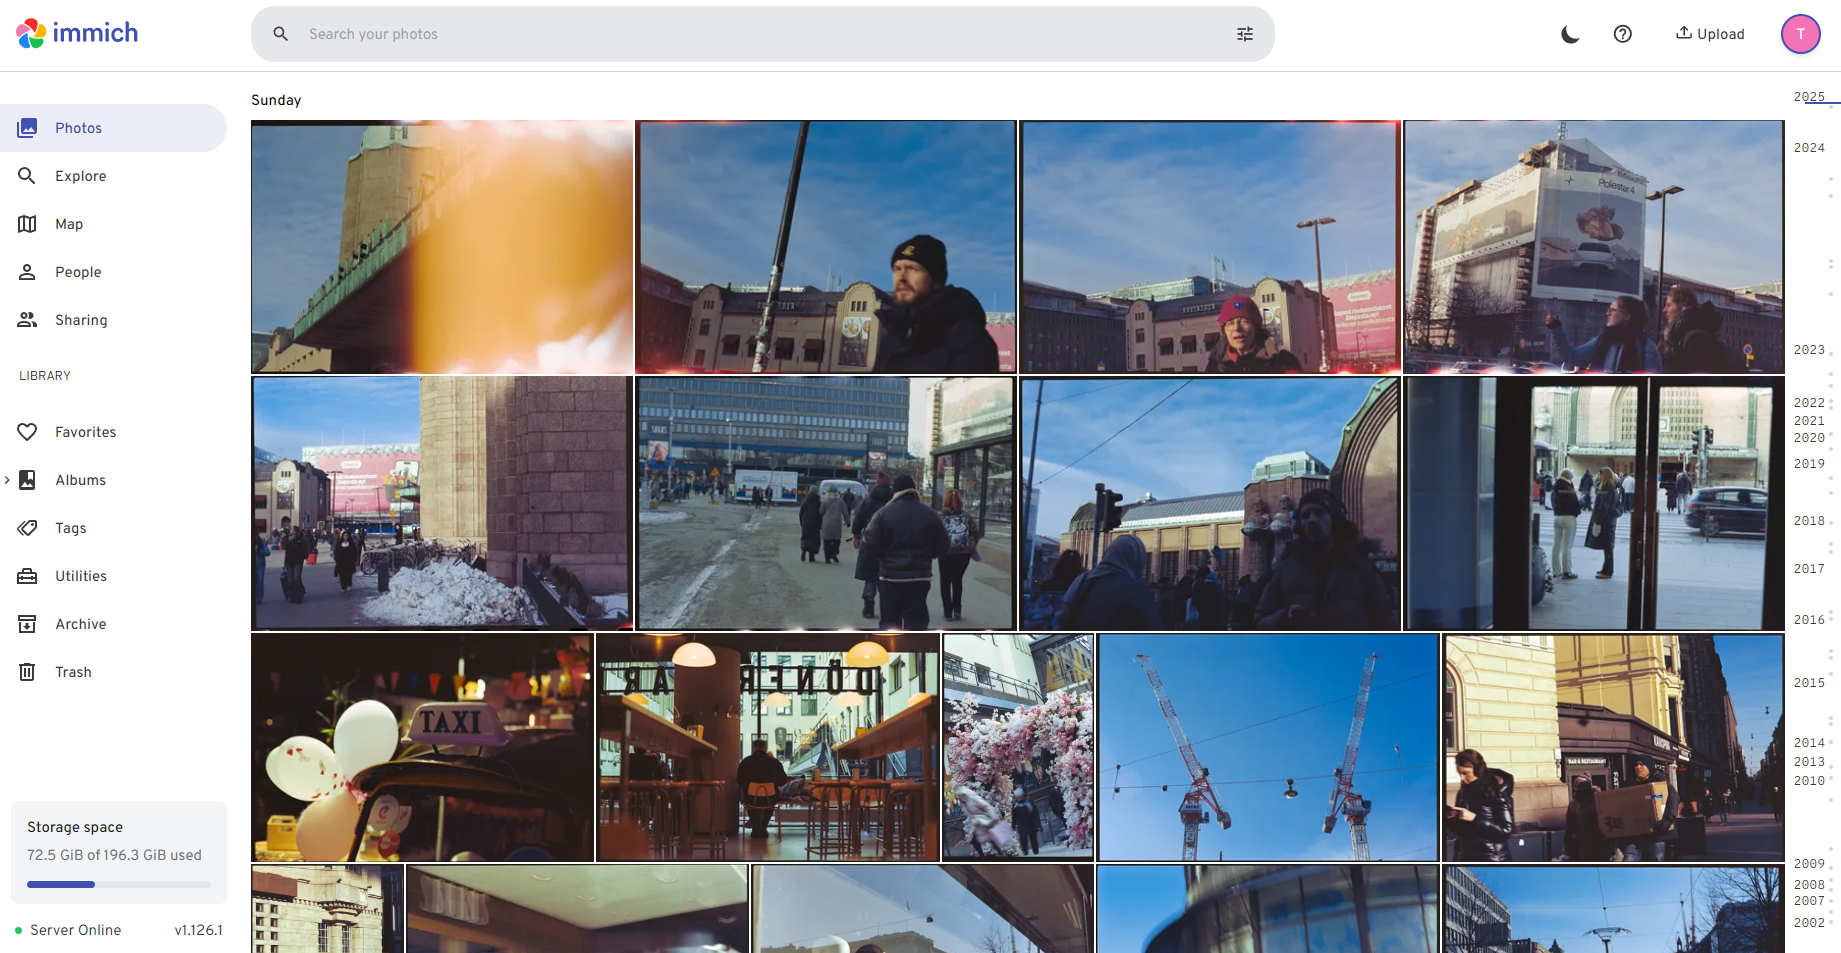
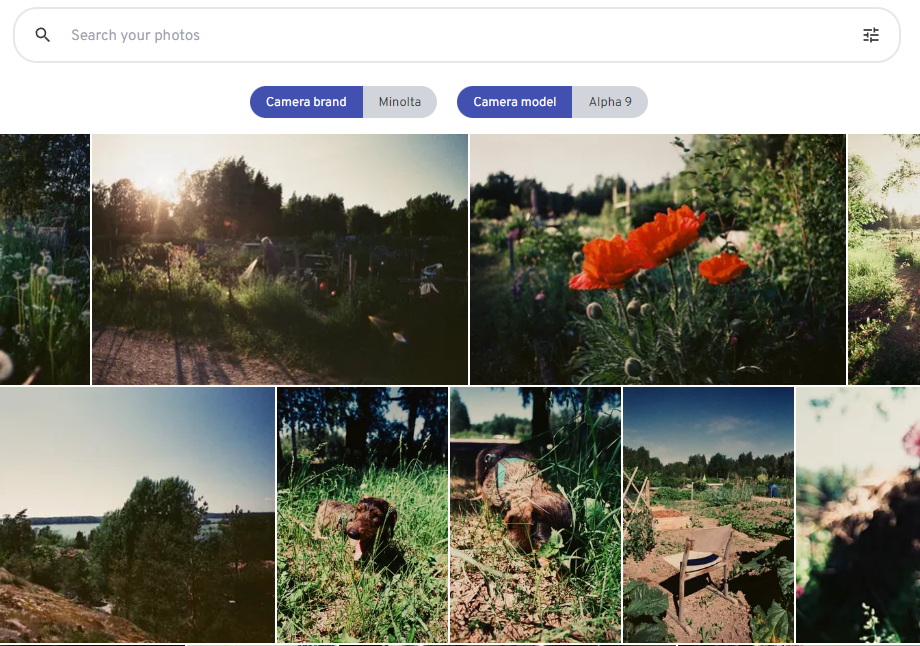
With the EXIF data in place, I can now search pictures based on my camera model.
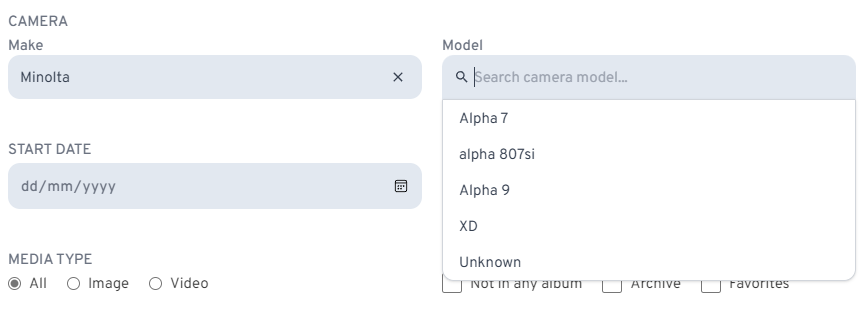
At this stage, you can see all the hard work paying off.
Follow my Threads account or BlueSky profile for your daily dose of photos.